
In this guide you will learn how to upgrade your Minecraft Server when it is hosted with Tigon Hosting.
We believe in ultimate flexibility for your Minecraft Server which is why it can be upgraded at anytime via your billing portal, upgrades are also processed instantly so no need to wait for the support team to get back to you.
Step 1
Login to the Tigon Hosting Billing Portal
Step 2
Once logged in, go to the Services option.

Step 3
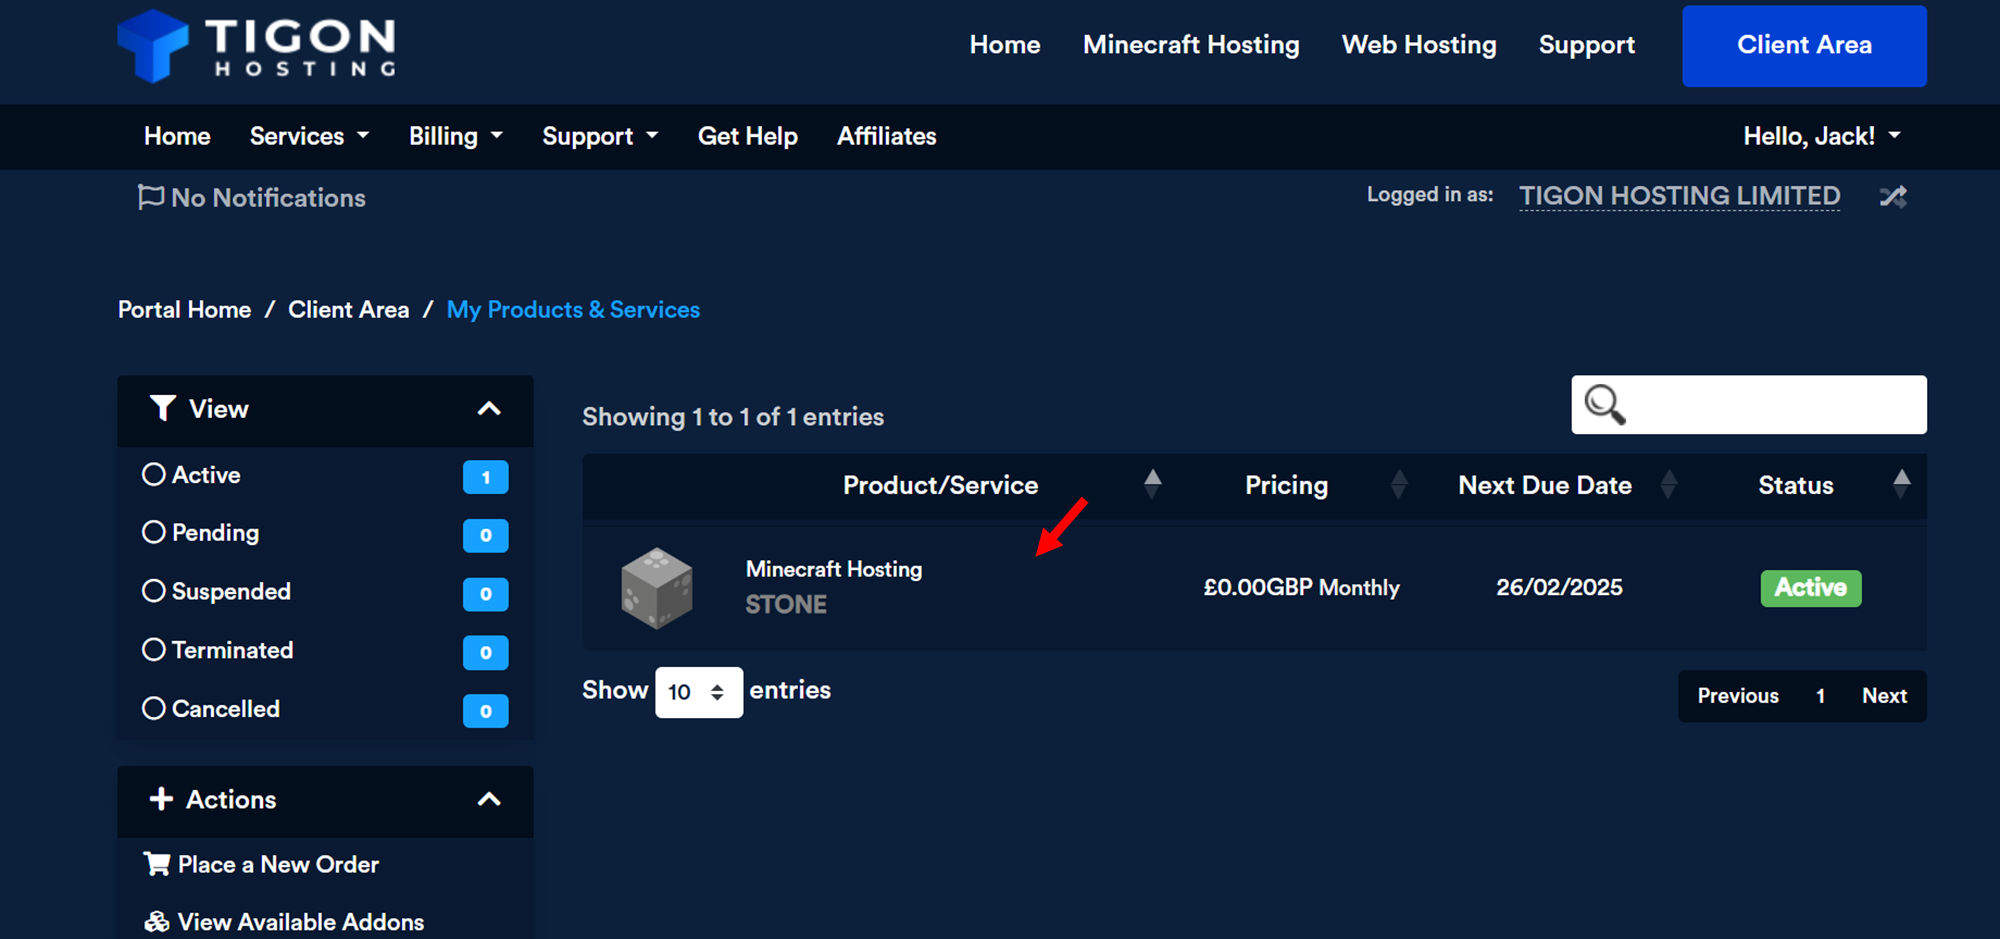
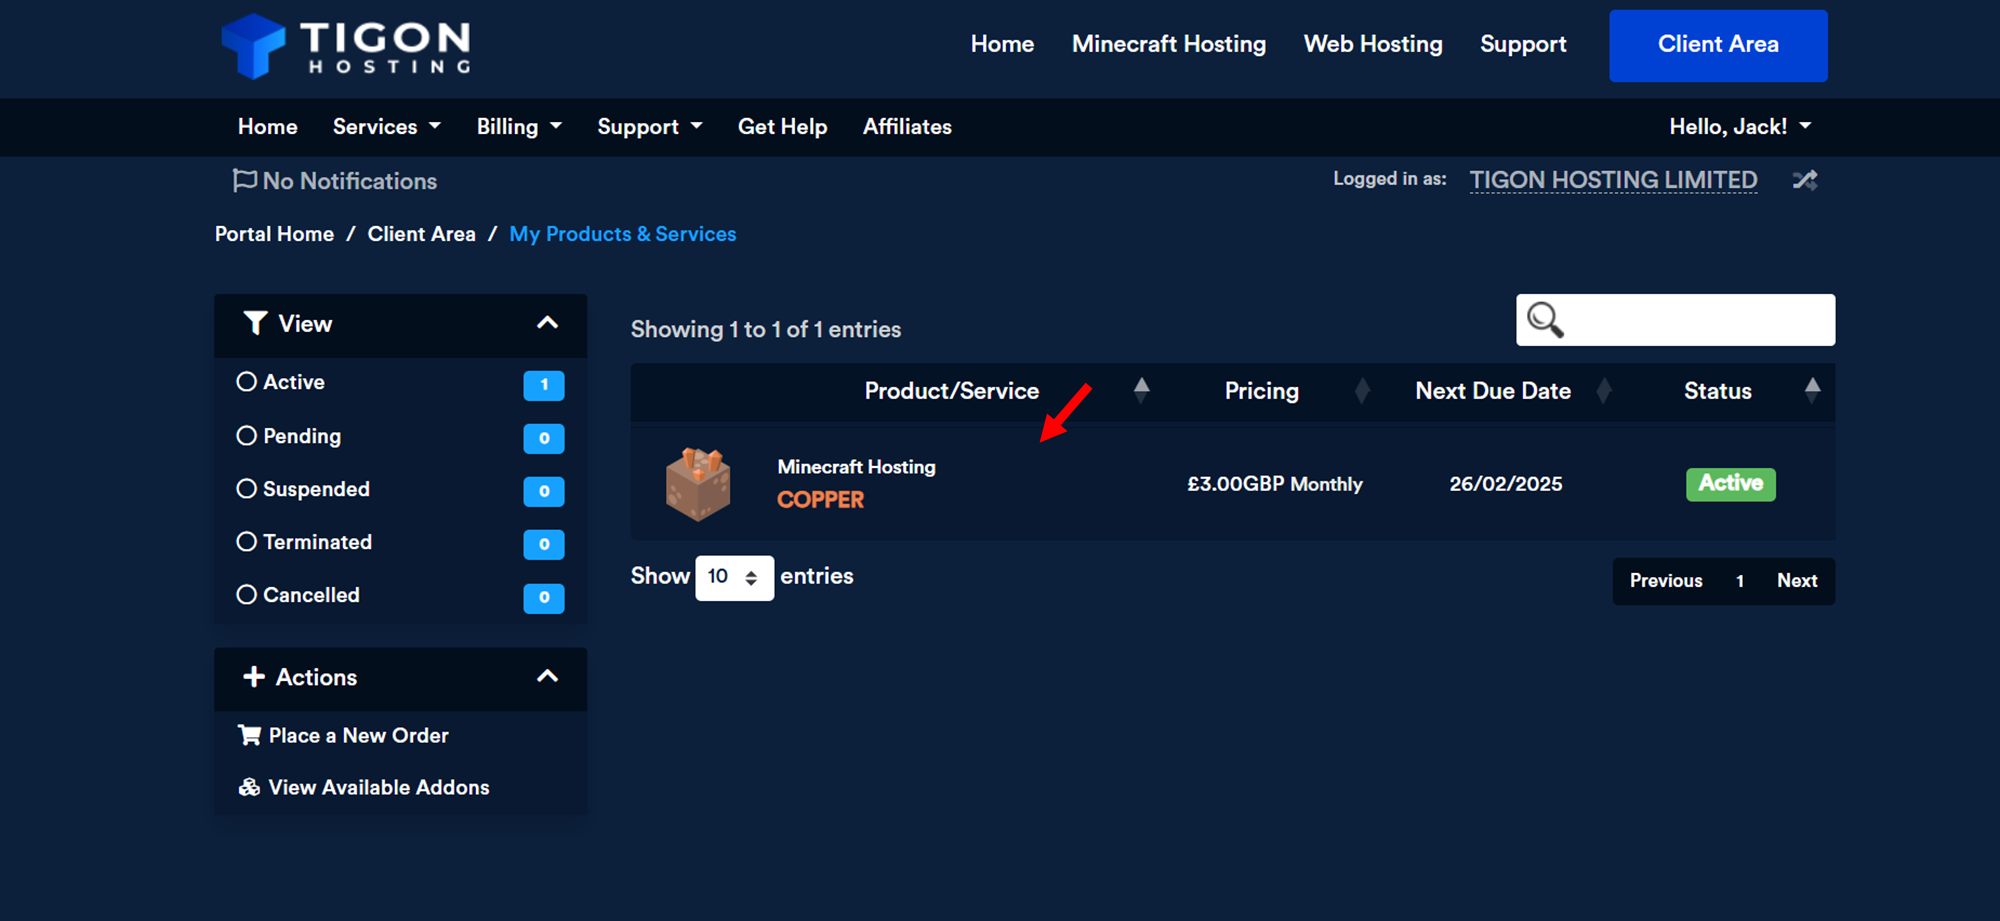
Select the product you want to upgrade. In this example we are going to upgrade this stone plan
Step 4
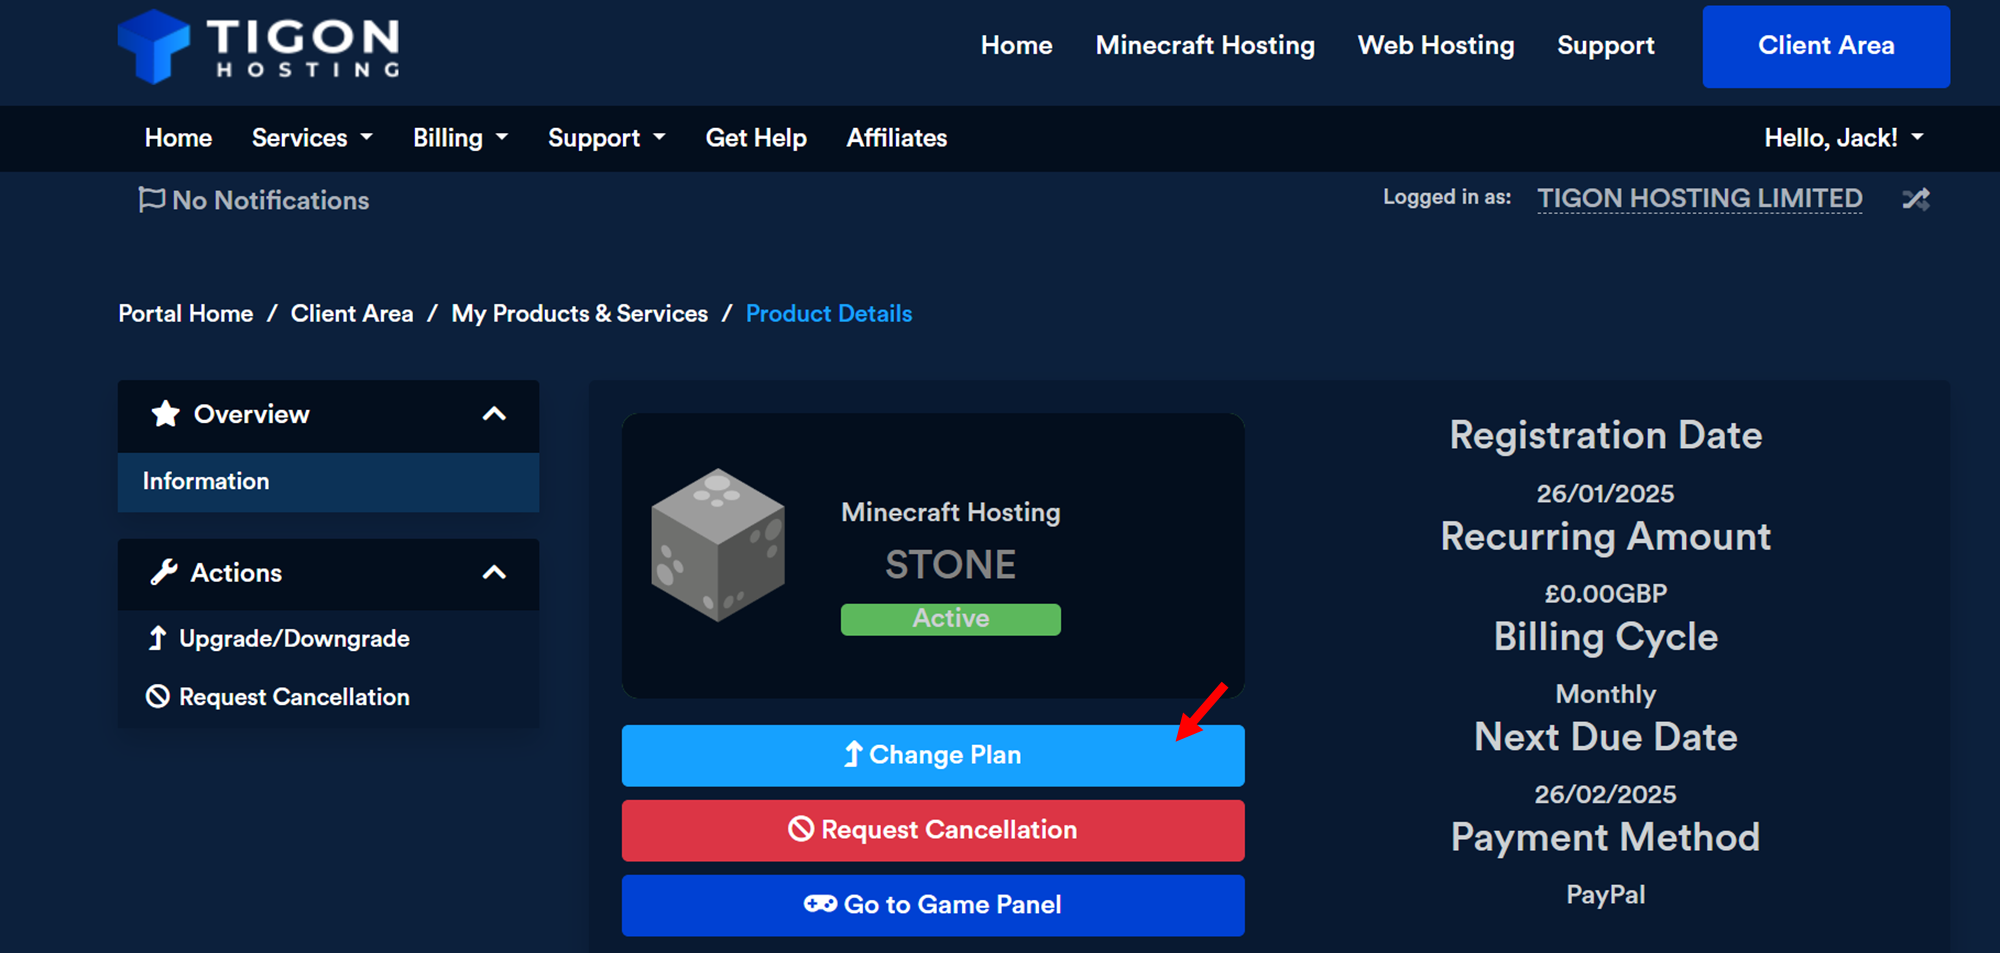
Select "Change Plan"
Step 5
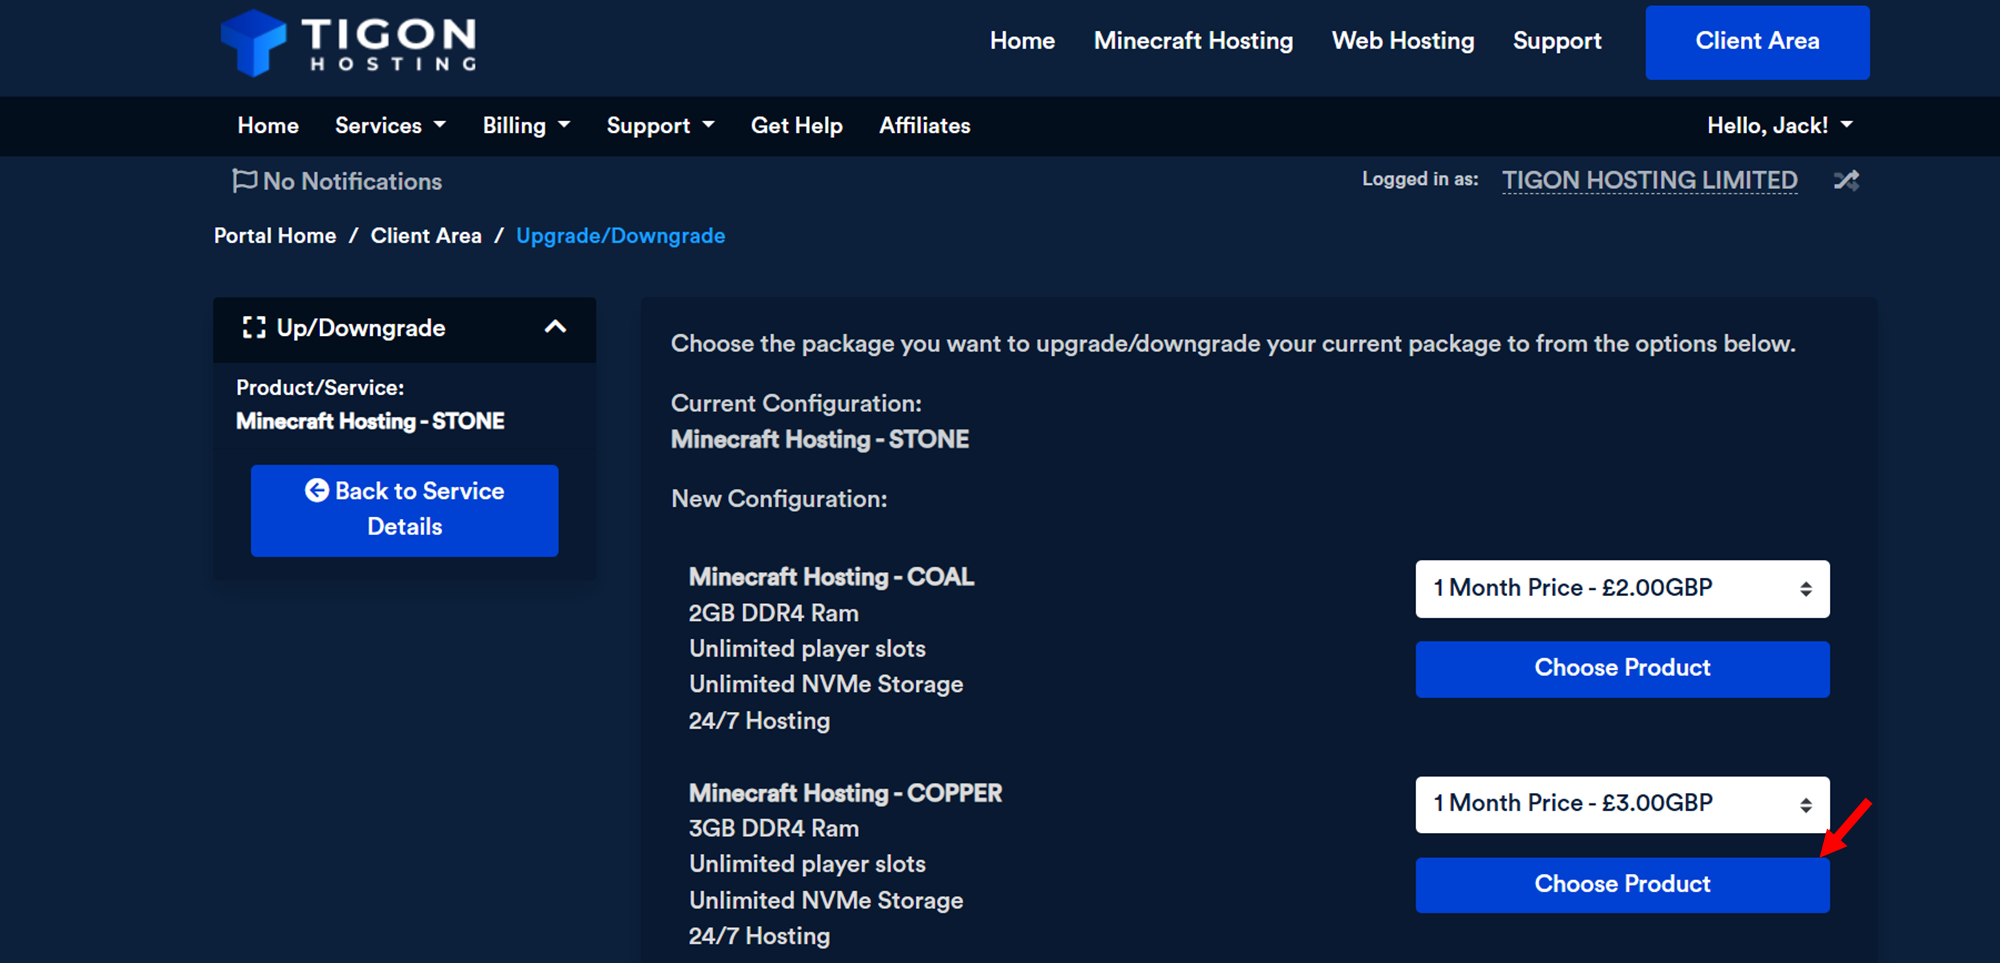
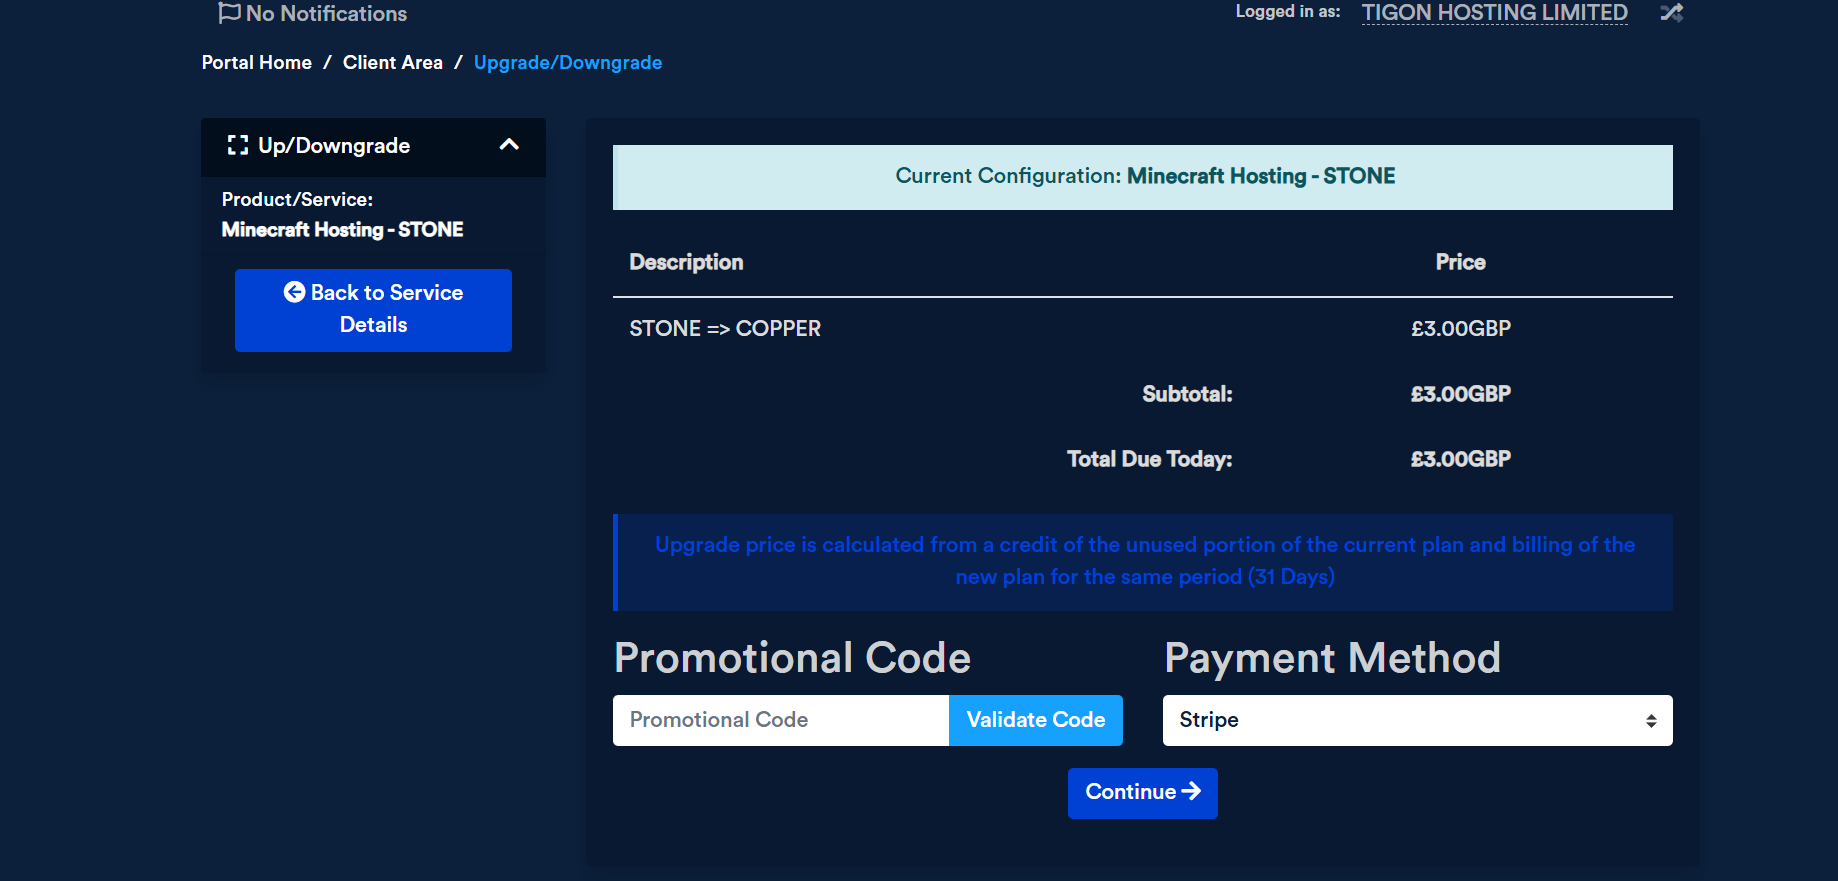
Select which plan you want to upgrade to. In this example we are going to upgrade to the Copper Plan. After confirming select your payment method and pay for your upgrade. After paying your invoice your service will automatically upgrade.
You may need to restart your server for the upgraded plan to take effect. If you need help doing this feel free to contact our friendly support team.